STEPS FOR Nebula PC Setup
STEPS FOR Nebula PC Setup
First things first, a huge thank you again for your purchase with us. It's people like you that makes our world go round!
STEP 1
Carefully Unpack Your PC for Initial Setup
To setup your PC for the first time, please remove all packaging carefully from outside and inside the computer.
PLEASE KEEP ALL PACKAGING (i.e. Carton, Foam Pieces and Internal Stuffing Material) Just in case for warranty returns.


STEP 2
Gather Essential Accessories for PC Setup
With your PC you should find a small plastic bag containing your spare parts, in this bag, what you need is the power cable and the Wi-Fi antenna (if applicable) for your PC. All the other items in the bag are spare, unless you are intending to install additional storage drives or other components, you will not require these. Please keep them in case you need them in future.
Here are some examples of what the bags and spare parts may look like. If your power supply comes with a pouch (right image), we will use this to store the spare parts.


Please Note: If your PC includes a Wi-Fi motherboard, you should be able to find the antennas in your pouch with the spare parts. Antennas may come in either form below depending on the model of your motherboard.

The back of your PC should look something like this (keep in mind every PC will look slightly different)

STEP 3
Connect Power Cable and Wi-Fi Antenna, Ensure
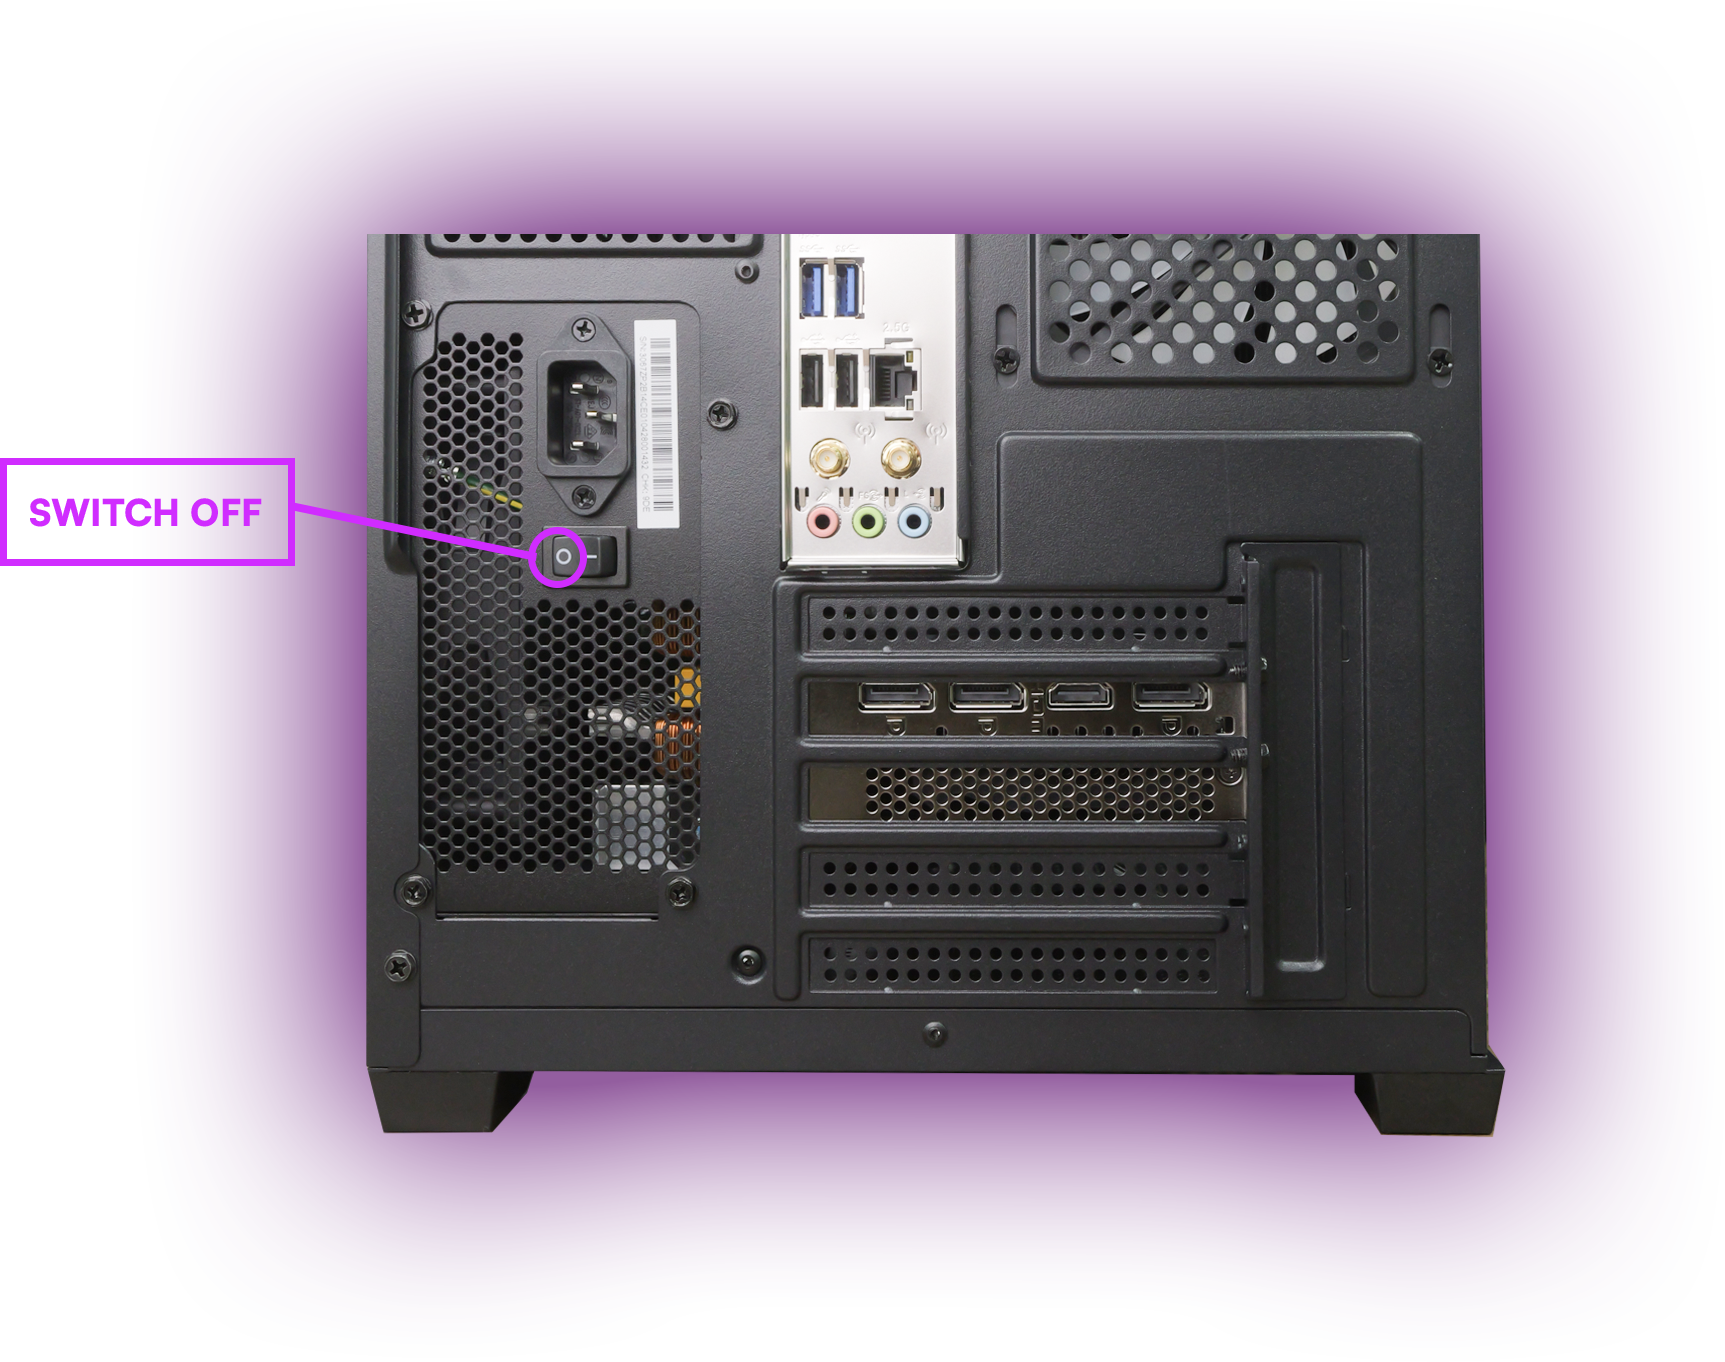
Power Supply is Off
Connect the power cable included and Wi-Fi antenna (if applicable) to your computer.
Before proceeding, make sure the PSU switch is set to the "O" (off) position to prevent any electrical hazards. Check that the power cable is properly plugged into both the PSU and a reliable power outlet, and confirm the Wi-Fi antenna is tightly fastened for a stable connection.


STEP 4
Connect Display Cable to Dedicated Graphics Card for
Optimal
Performance
Connect your display cable (either HDMI or DisplayPort) to the graphics card (as shown below). Do NOT plug your display cable/s into the motherboard ports as you will not get a display (if your CPU has integrated graphics, you will get a display however you should always be using your dedicated graphics card instead).
Please Note: On your graphics card, you will find you have 3x DisplayPort and 1x HDMI ports. DisplayPort is the newer technology, typically supporting higher bandwidths and resolutions, making it better suited for gaming and professional graphics work on PCS.


As shown on the image, please do not plug your display cables into the motherboard ports. You will not get a display by plugging it in here. We have placed black plugs to indicate that these ports should not be used.
STEP 5
Power On and Boot Up the Computer
Turn on the power supply by changing the position on the switch to “I” and start up the computer by pressing the power button on the tower!


STEP 6
Final Setup and Login Instructions
If you purchased a Windows license, all necessary drivers, settings and software have already been installed, nothing needs to be done on your end! If you are asked for a password to login, please press ENTER with no password.
If you purchased with own operating system, you will need to install an operating system of your choice. Please ensure to install your motherboard and graphics card drivers for proper operation.


STEP 7
Ready for Use - Start Downloading Your Favorite Games and Apps
Once the PC boots up and you are on your desktop, it's ready for you to start downloading all your favourite games and applications!


GAME PROMOTION REDEMPTION
Overwatch 2 Ultimate Battle Pass Bundle

Get Overwatch 2 Ultimate Battle Pass Bundle with Select GeForce RTX 40 Series
Start Date: 11th of August 2023
End Date: 9th of September 2023
Redemption End Date: 10th of October 2023
Bundle Offer: Get Overwatch 2 Ultimate Battle Pass Bundle with Select GeForce RTX 40 Series
Bundle SKUs: GeForce RTX 4090, 4080, 4070 Ti, or 4070 desktop or GPU
GeForce Overwatch 2 Invasion Bundle contents:
- All 3 Story Missions
- 3,000 OW2 Coins
- 1 Earnable Legendary Skin (Vigilante Sojourn)
- 1 Earnable Sojourn Hero License Unlock
- Premium Battle Pass + 20 Tier Skips
- 2 OW2 Legendary Skins (C-455 Sharpshooter Cassidy & K-2000 Blademaster Kiriko)
How To Claim:
Step
1. Redeem the GeForce Experience code first with the respective GPU manufactures below
2. Follow the GeForce Experience Redemption Instructions here: https://www.nvidia.com/en-au/geforce/campaigns/overwatch-2-invasion-pc-game-bundle/redemption-instructions/
More Info
https://www.nvidia.com/en-au/geforce/campaigns/overwatch-2-invasion-pc-game-bundle/?=&linkId=100000213495652&fbclid=IwAR2XjzCFlv1pD6h0GLX1j9uD8a2B5Ohateb0MLKOqSonqPmI0ZHHiCK2DUM
Terms and Conditions
https://www.nvidia.com/en-au/geforce/campaigns/pc-game-bundle-overwatch-2-ultimate-battle-pass/terms-conditions/
Starfield

For Starfield redemption, you will receive an email from us with a game code to redeem on www.amdrewards.com within 3 weeks of receiving your PC.
FREQUENTLY ASKED QUESTIONS
If you are facing issues setting up your computer, please contact us in your first instance and we will get back to you immediately!
Call us: 1300 553 985
Email: support@nebulapc.com.au

